No-Churn Ice Cream Recipe with Raw Honey
July 06, 2023
by Maggie Frank
Homemade ice cream can be difficult and require expensive equipment. After reading this recipe you’ll be sorry you didn’t find it sooner because it is just so easy to make. The base recipe is only three ingredients!! And you might already have them at home! Of course, the best part of making things at home is having a free range to experiment with new flavors. Maybe a honey swirl? With crumbled pistachios? Yum! Or upgrading to a mocha swirl? The possibilities are endless and oh-so-fun.
Before you ask, I’ll tell you how this recipe works. The main challenge to ice cream is making it creamy and full of air without any ice crystals. The way to do this is by chilling it down while constantly mixing it. Hence the purpose of an ice cream machine. They do a wonderful job but let’s be honest with ourselves for a minute. They’re exciting and wonderful but they’re also expensive and bulky to store.
With this recipe, I’ve illuminated these issues. How? By adding in the lightness and hair before freezing! And by using an ingredient that stabilizes it without allowing it to freeze solid! We’re talking about whipped cream and sweetened condensed milk!
The Ingredients
Heavy Whipping Cream
Traditional ice cream recipes usually use a blend of heavy whipping cream and milk. To keep the milk-fat high for the best mouth feel- all heavy cream is important. The magical thing about this ingredient is its ability to hold air when whipped.For this recipe, you can use any whipping cream you can find at your local grocery store. If you can, keep in mind that fewer ingredients in a recipe will mean the quality matter more for flavor. So if you can, a higher quality cream or maybe some from a local dairy farm would make a great option.
Sweetened Condensed Milk
You will find this ingredient with other canned, shelf-stable goods. It is a wonderfully indulgent sweetener that has a lot of benefits. It is a very stable ingredient. Meaning it won’t separate or crystalize your recipe. Sweetened condensed milk is by through a process of adding sugar to whole milk, and cooking it down to a thick syrup-like constituency.This ingredient will add all the sweetness we need. The thick syrupy consistency of the condensed milk is also responsible for taking our light and fluffy whipped cream to smooth and creamy.
No-Churn Ice Cream Recipe
Ingredients
2 cups heavy whipping cream1 14-oz can of sweetened condensed milk
½ scraped vanilla bean or 2 teaspoons of vanilla extract
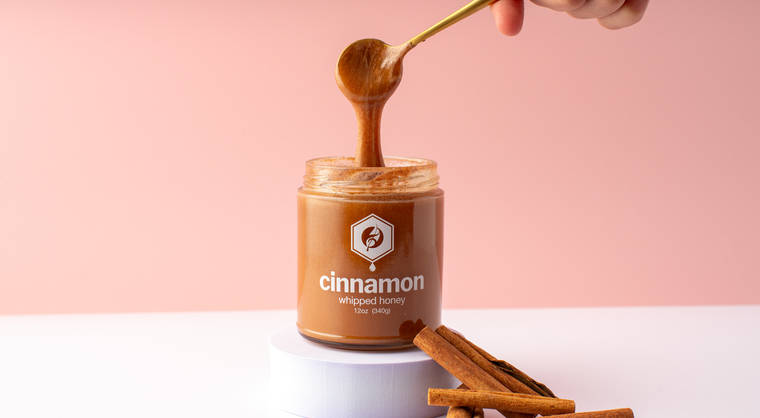
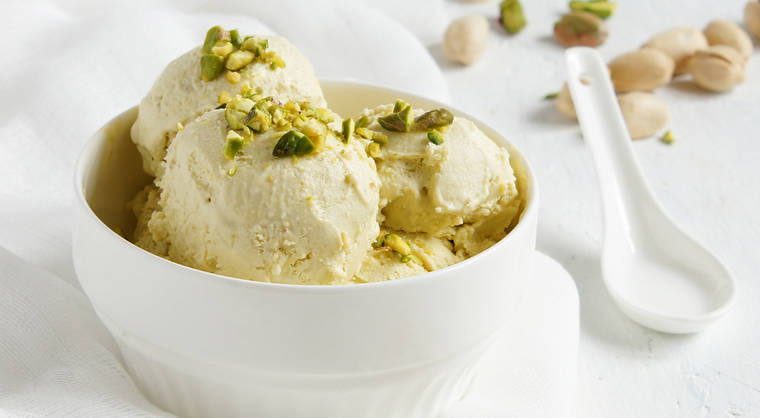
Cinnamon Honey and Pistachio Swirl variation
½ cup of Whipped Cinnamon Honey½ cup of crushed pistachios
Directions
First, let’s prepare our pan to store and freeze our ice cream.I would recommend a metal loaf pan because it will be easy to scoop out of! To protect your ice cream from any residual baking grease from your pan, line the entire thing with a few layers of plastic wrap. Leave some overhang that you can later use to cover up the top.
Try to avoid a plastic container because once it’s frozen it can crack under the pressure of your ice cream scoop.
In a large bowl whip up your heavy whipping cream until it forms stiff peaks. Be careful not to over-mix, it may make it hard to stir in the other ingredients. Once you can invert your whisk and the cream stays on the bottom holding its shape you are good to go.
Open your can of sweetened condensed milk and pour the entire thing right on top of your whipped cream. Using a spatula fold the sweetened condensed milk in. Mix carefully, slowly, and as little as possible. You do not want to deflate your mixture too much.
When you add in your condensed milk is also when you want to add in the flavoring that you want to be mixed into the entire base of your ice cream. In this case, you will add your vanilla bean or vanilla extract. Now will also be when you can add mix-ins like chocolate chunks or nuts.
Scrape your ice cream base into your prepared container and cover it with plastic laying right over the top.
How to swirl in Flavor
To make swirled ice cream you first need to add ½ of your ice cream base into your freezing container and then use a pastry bag or a small spoon but now globs of your swirl flavor around. Then take the back of a knife and gently move it around through the globs of flavor to make a swirl. Don’t over-mix! Then add the remainder of your ice cream base and repeat the swirling process on the top.
Freeze for 4 hours, then enjoy!